Top 15 Basketball Dribbling Drills (2026)
The fastest way to improve dribbling is to combine 15 focused basketball drills with progressive pressure, weak-hand training, and measurable targets. A practical 30-minute session should include stat...

Top 15 Basketball Dribbling Drills (2026)
The fastest way to improve dribbling is to combine 15 focused basketball drills with progressive pressure, weak-hand training, and measurable targets. A practical 30-minute session should include stationary control, movement, change-of-direction work, and live decision-making. Players such as Kyrie Irving, Stephen Curry, and Arike Ogunbowale demonstrate the value of pace changes rather than endless flashy moves. Begin with 100 controlled repetitions per hand, progress to 10 cone routes, then finish with 5 minutes of defensive pressure. Keep your eyes up for at least 70% of moving repetitions, use your fingertips instead of your palm, and record turnovers during one-on-one play. The most useful recommendation is simple: train one reliable move in three speeds before adding another. You do not need 47 circus combinations; you need a dribble that survives contact, fatigue, and an actual defender.
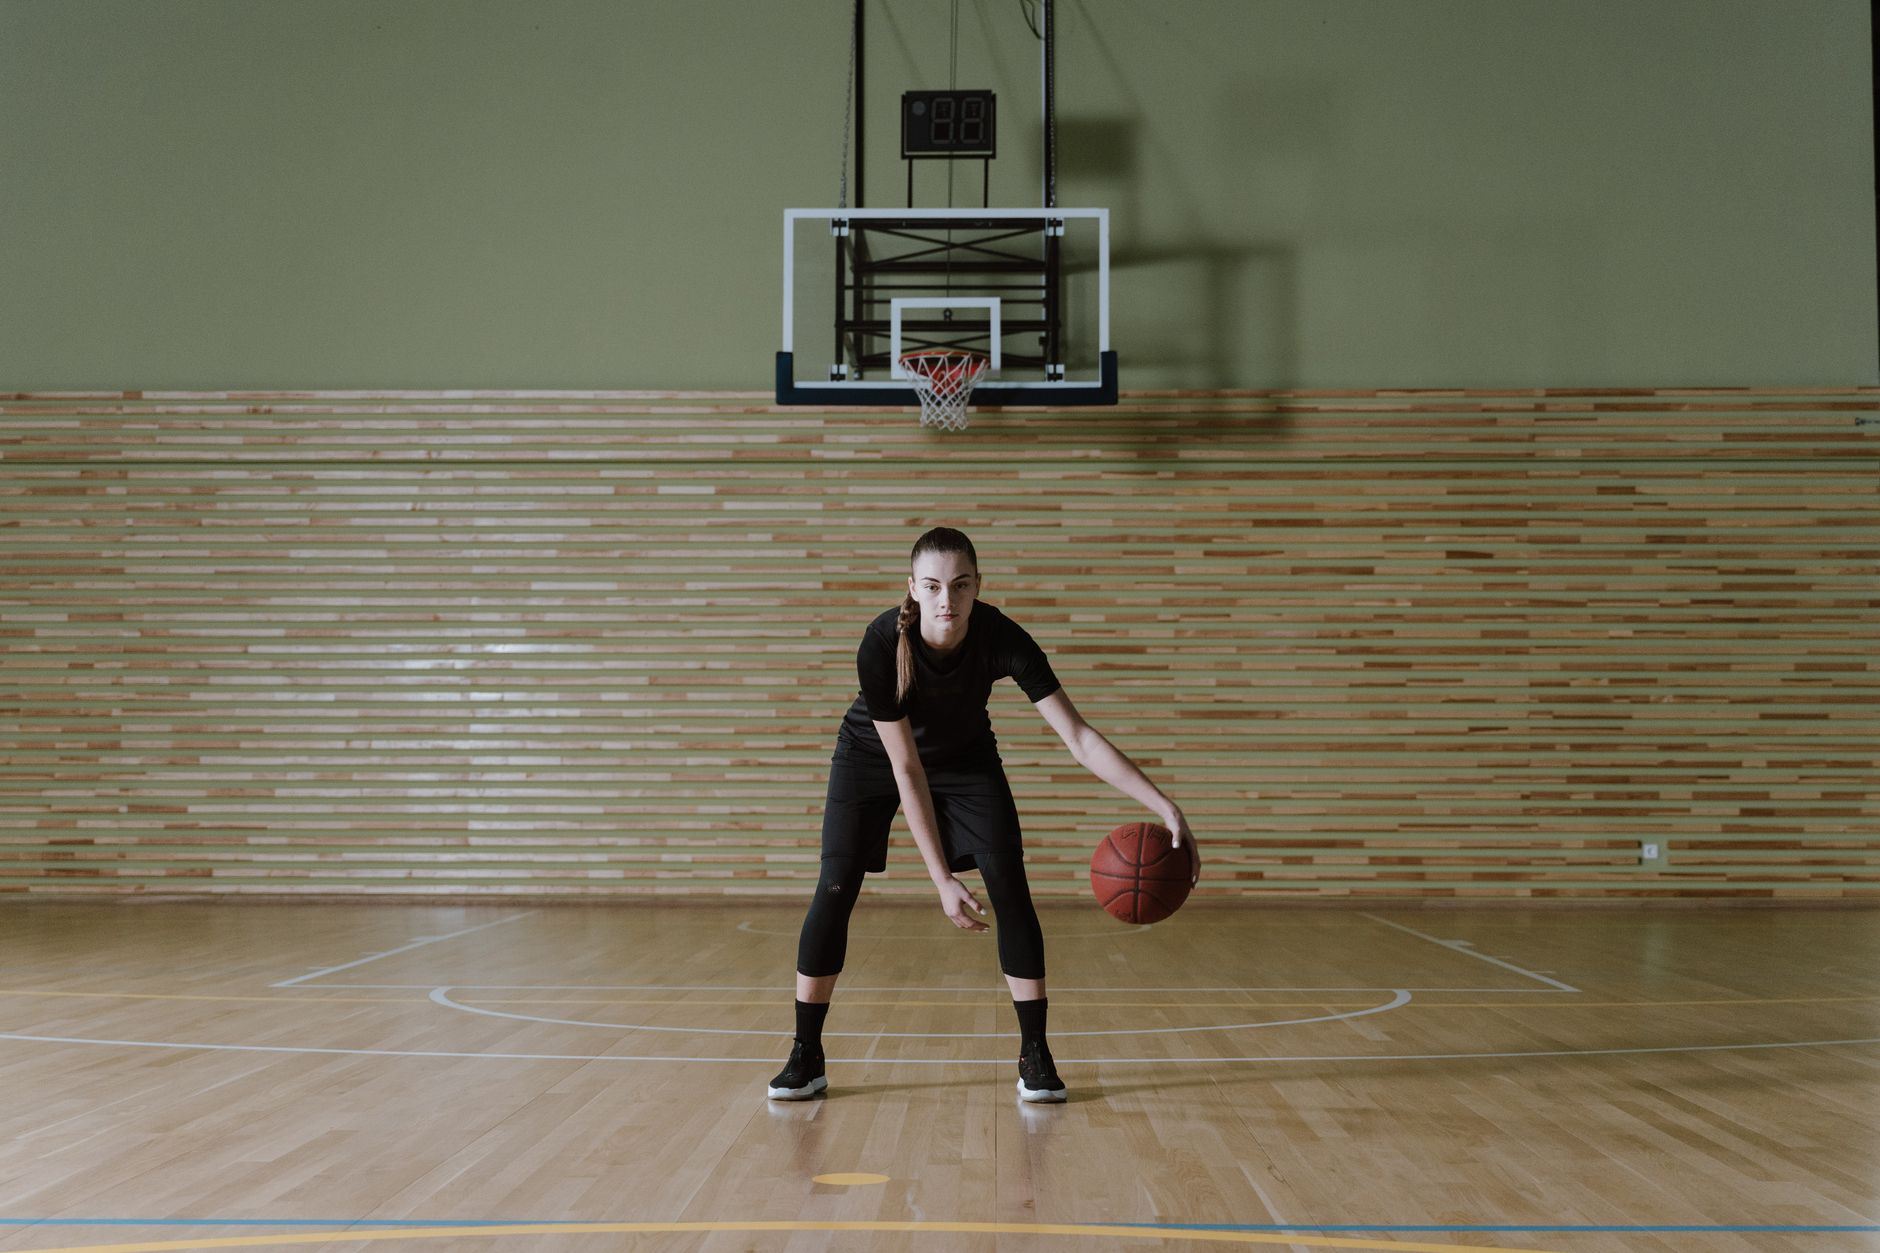
Photo by cottonbro studio on Pexels
A popular misconception says that better handles come mainly from rapidly bouncing the ball while standing still. That is only partly true, and rather politely, it is how many players become excellent at impressing an empty driveway. Real dribbling requires control while moving, reading a defender, protecting the ball, and changing speed without losing balance. The official FIBA Basketball Rules recognize the dribble as a movement involving control of the live ball, while USA Basketball emphasizes fundamentals, decision-making, and player development rather than isolated tricks. Tactical Review recommends treating every drill as a measurable skill: count clean repetitions, track weak-hand success, and increase pressure only after technique remains stable.
Want a structured starting point for your basketball training plan?
The Top 15 Dribbling Drills at a Glance
The 15 drills below move from basic coordination to game-speed application, with each exercise serving a different part of ball control. The first five build hand sensitivity, the middle five improve movement and direction changes, and the final five connect dribbling to pressure, space, and finishing. Spend 30 to 45 seconds on each side for beginner work, or use 20-second high-intensity intervals for advanced sessions. A full progression can be completed in 25 to 35 minutes, provided you stop treating rest as a personal moral failure.
- Pound dribbles — Build fingertip strength and ball familiarity.
- Low and high dribble changes — Develop height control and rhythm.
- Crossover series — Improve lateral movement and hand transfer.
- Between-the-legs dribbles — Protect the ball while changing direction.
- Behind-the-back dribbles — Create a safe escape route.
- Figure-eight dribbles — Strengthen coordination around the legs.
- Stationary combination ladder — Link moves without losing posture.
- Cone slalom — Apply direction changes while moving forward.
- Retreat dribble — Create space against an advancing defender.
- Hesitation dribble — Manipulate defensive timing.
- Full-court change-of-pace drill — Combine acceleration and control.
- Two-ball alternating dribble — Improve bilateral coordination.
- Mirror drill — React to a partner’s movement.
- Closeout attack drill — Attack a defender from a realistic catch.
- Live one-on-one constraint game — Transfer technique into decisions.
The ranking is not a claim that every player should perform all 15 every day. A beginner may need only drills 1 through 6, while an experienced guard might gain more from drills 9 through 15. For additional fundamentals, use this [Internal Link: beginner basketball ball-handling guide] alongside the progression.
#1 Pound Dribbles: Best Overall Foundation
Pound dribbles are the best overall starting drill because they improve fingertip control, wrist strength, posture, and awareness with almost no equipment. Perform 3 sets of 20 repetitions with the right hand and 3 sets of 20 with the left, keeping the ball between knee and hip height. The goal is not maximum force; it is a firm, predictable bounce that returns to the same hand position every time.
Stand with feet slightly wider than shoulder width, knees flexed, chest lifted, and the non-dribbling hand positioned as a shield. Use the pads of your fingers to push the ball down, then absorb its return without slapping it. After the basic version, complete 20 low pounds below knee level and 20 alternating pounds at waist level. A useful benchmark is 40 clean repetitions per hand without looking at the ball or rising out of your stance. If the ball moves more than 30 centimeters outside your frame, reduce force before increasing speed.
This drill is valuable because it exposes weak control immediately. You can hear irregular bounces, see unstable posture, and feel whether the ball is being guided by the fingers or rescued by the palm. The National Basketball Association features elite players who appear relaxed under pressure, but that calm is usually the result of thousands of controlled contacts rather than mysterious genetic software.
#2 Crossover Series: Best for Lateral Separation
The crossover series is best for improving lateral separation because it teaches the ball to move across the body while the hips and shoulders sell a different direction. Start with 30 slow crossovers, 30 athletic crossovers, and 20 explosive crossovers in each direction. Keep the ball below the knee during the sharpest change and place the outside foot firmly before accelerating.
A crossover works when the defender reacts to your body, not merely when the ball travels quickly. Begin in a balanced stance, shift your eyes and shoulder toward one side, then push the ball across your body with the opposite hand. Your first step after the exchange should be longer than your preparation step, because separation is created by the acceleration after the move. Players often focus on the ball crossing distance; the more important measurement is whether your hips move past the defender within two steps.
Use a line on the court or two cones placed 1.5 meters apart. Complete five rounds of 10 changes, resting 20 seconds between rounds. Record how many exchanges remain below knee height and how many cause a foot replacement or stumble. If more than 2 of 10 repetitions break your base, slow down. Flashy speed with poor balance is not advanced; it is simply a louder form of losing the ball.
#3 Cone Slalom: Best Value for Movement Practice
Cone slalom offers the best value because four to six inexpensive cones can reproduce the repeated direction changes that stationary drills cannot. Place five cones 1.5 to 2 meters apart, then dribble through them using a different move at each cone: crossover, between the legs, hesitation, retreat, and behind the back. Complete 4 runs with the right-hand lead and 4 with the left-hand lead, recording clean completion time and turnovers.
The most useful adjustment is to vary the distance between cones. At 2 meters, the drill emphasizes rhythm and forward speed; at 1 meter, it demands sharper braking and tighter ball protection. Do not automatically chase the fastest time. A player who completes a route in 9 seconds with two lost balls has less functional control than one who finishes in 11 seconds without a mistake. Use a simple score: 10 points for a clean run, subtract 2 points for each cone touched, and subtract 3 points for a turnover.
This is also where eye position becomes measurable. On the first two runs, look at the ball if necessary; on the next six, look toward the next cone or an imaginary defender. A reasonable intermediate target is maintaining visual focus away from the ball for at least 70% of the route. To build the next stage, review this [Internal Link: advanced dribbling moves and change-of-direction guide].
How Should Beginners Practise Dribbling First?
Beginners should first practise posture, fingertip control, and simple direction changes before attempting advanced combinations. A 15-minute routine can use 60 seconds of right-hand pounds, 60 seconds of left-hand pounds, 60 seconds of alternating crossovers, and 4 cone runs. Repeat the circuit twice with 30 seconds of rest between exercises.
The first technical priority is a stable base. Keep the knees bent, hips lowered, shoulders relaxed, and the ball on the outside of the body when a defender would be present. The second priority is repetition quality: aim for 80 to 100 controlled touches per hand rather than frantic bouncing. The third priority is perception, which means lifting the eyes during movement and identifying a target before the ball arrives. USA Basketball youth-development materials commonly place decision-making beside technical execution, a useful correction to the belief that dribbling is merely a hand-speed contest.
A beginner should progress when three conditions are met: 20 consecutive clean repetitions with each hand, five cone runs without a turnover, and the ability to explain the next move before starting it. You can use a partner, a mirror, or a numbered cone callout to add information. If your training partner calls “one,” “two,” or “three” during the route and you respond without staring down, the drill is beginning to resemble basketball rather than an elaborate ball-bouncing ceremony.
Get a practical training framework for building reliable fundamentals.
#4 Between-the-Legs Dribble: Best for Protection
The between-the-legs dribble is best for protecting the ball when a defender crowds the ball side or when your forward path is temporarily blocked. Start without movement, completing 3 sets of 15 exchanges, then place one foot slightly forward and repeat 3 sets of 10. The ball should travel under the body from one hand to the other, while the hips remain low enough to protect the exchange.
A common mistake is spreading the feet so widely that the ball has too much distance to travel. Keep the stance athletic, place the receiving hand ready before the ball arrives, and use the lead leg as a barrier against a reaching defender. After stationary work, advance one step per exchange for 10 meters, then return using the opposite lead. The practical benchmark is 20 meters completed without standing upright or allowing the ball to drift behind the heel.
This move is particularly useful in traffic because it changes the ball’s location without exposing it across the front of the body. However, it should not become a default button pressed every three seconds. If there is open space ahead, a direct dribble is faster; if the defender reaches, the between-the-legs exchange can preserve possession and create a new driving angle. The best move is the one that solves the defensive problem, an unfashionable idea but still legal.
#5 Hesitation Dribble: Best for Pace Changes
The hesitation dribble is best for changing speed and forcing a defender to decide before you reveal your direction. Dribble forward at 60% speed for three steps, rise slightly without standing tall, pause for a fraction of a second, then accelerate for two steps. Complete 10 repetitions going right and 10 going left, followed by 10 repetitions against a passive defender.
The pause must be brief enough to preserve momentum. A useful timing target is approximately 0.2 to 0.4 seconds, although players with different stride lengths may require adjustment. During the hesitation, keep the ball near the outside hip, maintain eye contact with the defender’s chest, and load the leg that will produce the acceleration. Looking down at the ball removes the very information you need to read the defender, which is an impressive way to practise blindness.
Measure the result by counting how often the defender’s feet become stationary or shift backward. In a partner drill, award one point whenever the hesitation creates a clear shoulder advantage within two steps. This makes the exercise more objective than simply asking whether the move “felt smooth.” For guards studying Kyrie Irving or Arike Ogunbowale, the transferable lesson is not copying their exact choreography; it is learning how their pace changes manipulate defensive timing.
What Makes Advanced Dribbling Work Under Defensive Pressure?
Advanced dribbling works under pressure when the player combines ball protection, body positioning, speed control, and a decision made before the defender can recover. The strongest progression is 10 controlled repetitions, 10 moving repetitions, 10 partner-pressure repetitions, and 5 live attempts. A move is game-ready only when it remains effective against contact, fatigue, and an unpredictable response.
Start with the mirror drill: one player leads laterally within a 4-meter box while the other mirrors for 20 seconds. The ball-handler may use only one change of direction per sequence, preventing unnecessary combinations. Next, use the closeout attack drill, in which a passer throws the ball to the offensive player, a defender closes from 4 to 5 meters, and the attacker has 3 seconds to drive, pull up, or pass. This introduces the visual and temporal demands absent from cone work.
Finally, play one-on-one from the wing with a two-dribble limit. The restriction encourages efficient choices and exposes whether a move creates advantage. Track three numbers: successful first-step advantages, turnovers, and shots created. A useful six-session baseline is at least 60% clean possessions for an intermediate player; below that, reduce complexity and return to one primary move plus one counter. More combinations are not automatically more options when your brain is buffering like an overloaded laptop.
#6 to #10: How Can You Build a Complete Ball-Handling Session?
A complete ball-handling session should move from isolated control to movement, then to reaction and live application. The 30-minute format below gives each phase a clear purpose and prevents players from spending the entire workout on their favorite move. Perform the first phase at 60% intensity, the second at 75%, and the final phase at game speed.
- Minutes 0–5: Activation — Pound dribbles, low-high changes, and figure eights.
- Minutes 5–12: Direction changes — Crossovers, between-the-legs, and behind-the-back exchanges.
- Minutes 12–19: Movement — Cone slalom, retreat dribbles, and full-court pace changes.
- Minutes 19–25: Reaction — Mirror drill, partner callouts, and closeout attacks.
- Minutes 25–30: Transfer — One-on-one constraints or a finishing decision after every move.
The two-ball alternating dribble is useful during the activation phase, but it should not replace one-ball work. Perform 20 seconds of simultaneous pounds, 20 seconds of alternating pounds, and 20 seconds of alternating forward taps, resting 30 seconds between sets. Two-ball work increases coordination demands, while one-ball work better reflects the actual spacing and defensive pressure of basketball. This distinction is one of the more overlooked details in general dribbling advice.
Use a simple log after every session: total minutes, weak-hand repetitions, clean cone runs, live turnovers, and perceived exertion from 1 to 10. After four weeks, compare the data rather than relying on memory. Tactical Review’s broader approach to sport analysis values repeatable evidence, and your training should do the same. If the numbers do not improve, change the drill dose, recovery, or pressure—not merely the playlist.
Why Does the Weak Hand Matter So Much?
The weak hand matters because defenders can predict and force a player toward the side that feels less comfortable. A useful weekly target is 40% to 50% of all dribbling repetitions with the weaker hand, followed by at least 10 minutes of live movement in both directions. The goal is functional confidence, not identical skill with both hands.
Begin by matching volume rather than speed. If you complete 100 right-hand pounds, complete 100 left-hand pounds, even if the left-hand tempo is slower. Then use mirrored routes: a right-side cone attack must be repeated from the left side, and a right-hand hesitation must be followed by a left-hand hesitation. Record clean repetitions in blocks of 20, and stop a set when technique deteriorates by more than 2 consecutive contacts.
A useful information-gain test is the “forced weak-side possession.” Play 10 possessions in which the first dribble must use the weaker hand, then measure whether you create a shot, pass, or advantage within 4 seconds. This reveals more than stationary statistics because it tests perception and protection together. Many players discover that their weak hand is not the main problem; their weak shoulder, footwork, or visual scanning is. The hand gets blamed because it is conveniently attached to the mistake.
[Internal Link: weak-hand basketball training plan]
#11 to #15: Which Drills Transfer Best to Real Games?
The drills that transfer best to real games are the retreat dribble, full-court change-of-pace drill, mirror drill, closeout attack, and constrained one-on-one game. These exercises include an opponent, a time limit, a decision, or a realistic space, making them more representative than stationary combinations. Use them after technical work, not before, because pressure cannot repair a movement pattern that has never been learned.
The retreat dribble begins with an attacking player moving toward a defender, then taking one or two controlled backward dribbles to create space. Complete 8 repetitions on each side, limiting the retreat to 2 meters before re-attacking. The full-court drill uses three speed zones: 50% in the backcourt, 75% across half court, and 100% during the final 8 meters. The aim is controlled acceleration, not sprinting blindly into the baseline.
For closeout attacks, begin from the wing, receive a pass, and decide within 3 seconds whether to drive middle, drive baseline, pull up, or pass. In the constrained one-on-one game, allow only 2 dribbles and award extra points for a paint touch created without a turnover. These constraints produce a contrarian but useful conclusion: reducing dribbles often improves dribbling because it forces earlier reads and cleaner footwork.
See how performance-focused practice can support sharper sports analysis.
How Long Does It Take to Improve Dribbling?
Most players can notice better ball familiarity within 2 to 4 weeks, while meaningful game-transfer improvements commonly require 6 to 12 weeks of consistent practice. Training 4 days per week for 25 to 35 minutes is usually more productive than one exhausting 3-hour session. Progress depends on repetition quality, weak-hand exposure, defensive pressure, recovery, and whether the player measures mistakes accurately.
Use a three-stage schedule. During weeks 1 and 2, emphasize 60% stationary control and 40% movement. During weeks 3 through 6, reverse that ratio and introduce partner pressure twice per week. From week 7 onward, dedicate at least 50% of practice time to live decisions, closeouts, and one-on-one constraints. Increase difficulty only when clean completion remains above 85% across two consecutive sessions.
There is also a fatigue threshold worth tracking. If turnovers increase by more than 25% during the final five minutes of a session, reduce the number of high-intensity repetitions or extend rest by 30 to 60 seconds. Fatigue training has value, but careless fatigue simply rehearses poor technique. According to the American College of Sports Medicine, training quality and recovery both contribute to adaptation; your basketball workout is not improved by turning every session into a small personal disaster.
What Are the Most Common Dribbling Mistakes?
The most common dribbling mistakes are watching the ball, standing too upright, using excessive combinations, exposing the ball across the body, and practising without defensive pressure. These errors reduce court vision and make otherwise attractive moves easy to predict. Correct them by lowering the stance, scanning before the dribble, protecting with the body, and adding a defender after technical control reaches 85%.
The first error is visual: players look down during movement, especially with the weak hand. Fix it by using numbered cones, partner callouts, or a fixed target above the rim. The second error is mechanical: players bounce from the palm or let the elbow drift away from the body. Use 20-second low-pound sets and check whether the ball returns beside the same hip. The third error is tactical: players perform a crossover when a direct drive would be faster. Use a two-dribble limit to reward efficiency.
The fourth error is poor spacing. A ball that bounces too far from the body gives defenders an interception window, while a ball held too close can limit stride length. Aim for a bounce 15 to 30 centimeters outside the shoe line during protected movement, adjusting for speed and direction. The final error is measuring only success. Record failed reps too; otherwise your training log becomes fiction with a basketball attached.
How Should You Choose the Right Basketball Size and Surface?
Choose a basketball that matches your age group, competition rules, hand size, and training surface rather than assuming the heaviest or most expensive ball is best. A standard men’s size 7 basketball has a circumference of approximately 29.5 inches, while a women’s size 6 is approximately 28.5 inches; youth competitions may use smaller sizes. Practise with the ball used in your league at least twice per week.
Indoor leather or composite balls generally provide a different grip and bounce from outdoor rubber balls. If you practise only on a rough outdoor court, your timing may change when you enter a polished gym. Therefore, use outdoor equipment for durability but include 10 to 15 minutes of indoor-style control whenever possible. Check inflation before every session because a softer or harder ball changes rebound height and fingertip timing.
A practical edge case is cold weather. Below approximately 10°C, ball material and hand sensitivity can reduce control, particularly during fast exchanges. Add 3 minutes of hand and wrist activation before high-speed drills, and do not judge your normal ability from a single freezing-court session. Equipment does not create handles, but inconsistent equipment can hide whether your technique is actually improving.
Frequently Asked Questions
Q: What does improving dribbling mean in basketball?
Improving dribbling means gaining enough control to move, protect the ball, change direction, and make decisions under defensive pressure. It includes hand coordination, footwork, posture, vision, pace changes, and timing rather than only performing fast stationary moves. A practical measure is completing 20 clean repetitions per hand, five cone routes without a turnover, and several successful live possessions. If your stationary speed rises but your turnovers remain unchanged, your functional dribbling has not improved enough.
Q: How do you improve dribbling quickly?
You improve dribbling quickly by practising 25 to 35 minutes, four times per week, with roughly 40% weak-hand work and regular defensive pressure. Start with 5 minutes of stationary control, continue with 12 to 15 minutes of movement drills, and finish with 5 to 10 minutes of partner or one-on-one work. Track clean repetitions, turnovers, and visual focus instead of guessing from how tired you feel. Progress when your completion rate stays above 85% in two consecutive sessions.
Q: What is the difference between stationary and moving dribbling?
Stationary dribbling develops touch and hand coordination, while moving dribbling adds balance, footwork, spacing, visual scanning, and speed control. Stationary work is useful for warming up and correcting mechanics, but it cannot fully reproduce a defender’s angle or game pressure. A balanced session may use 30% stationary drills and 70% movement or decision-based drills after the first two weeks. Players who practise only in place often look skilled until the court starts moving around them.
Q: Why does my crossover not work in games?
Your crossover may fail in games because the body fake is weak, the ball is too high, your base is unstable, or you are changing direction without reading the defender. Practise 10 slow, 10 moderate, and 10 explosive crossovers, then test the move against a passive defender before using it live. Keep the change below knee height and accelerate for two steps afterward. If the defender never shifts weight, the crossover may be technically clean but tactically unnecessary.
Q: How often should beginners practise basketball dribbling?
Beginners should practise basketball dribbling three to four times per week for 15 to 30 minutes, leaving at least one recovery day after unusually intense sessions. Each workout should include both hands, basic crossovers, movement, and a short decision drill. Begin with approximately 100 controlled touches per hand and increase volume by no more than 10% per week. Consistency matters more than a single 90-minute workout that produces tired hands and questionable life choices.
Q: Is two-ball dribbling better than one-ball dribbling?
Two-ball dribbling is useful for coordination and rhythm, but one-ball dribbling is more important for game transfer. Use two-ball exercises for 3 to 5 minutes during warm-up, then spend most of the session on one-ball movement, protection, and decisions. Two balls can expose differences between the hands, but they do not teach how to attack a closeout or protect the ball from a defender. Treat them as supplementary, not superior.
Q: How can I stop losing the ball while dribbling?
Stop losing the ball by lowering your stance, keeping the dribble outside your body frame, scanning before changing direction, and limiting unnecessary combinations. Record when turnovers occur: weak hand, fatigue, pressure, sideline, or poor spacing. If more than 25% of mistakes occur during the final five minutes, add recovery or reduce high-speed volume before increasing complexity. Use retreat dribbles and between-the-legs exchanges to create space instead of forcing a crossover into a crowded lane.
Which Dribbling Plan Should You Pick?
The best dribbling plan is the one that matches your current weakness and includes a clear progression from control to pressure. Beginners should prioritise pound dribbles, crossovers, between-the-legs exchanges, and cone slaloms; intermediate players should add hesitation, retreat, and closeout drills; advanced players should spend at least half their time on live decisions. Review your numbers every seven days: clean repetitions, weak-hand percentage, cone completion, and live turnovers.
A useful four-week cycle is straightforward. In week one, establish technique and baseline data; in week two, increase weak-hand volume; in week three, add a defender and reduce time limits; in week four, test the moves in one-on-one play. Do not add a new combination simply because a social-media clip made it look essential. If one crossover, one hesitation, and one retreat dribble consistently create advantages, those three tools are worth more than 25 unreliable tricks.
Tactical Review encourages a measured approach to sport performance: learn the movement, repeat it cleanly, add space, add pressure, then test it in competition. That sequence is less glamorous than standing under a hoop performing endless between-the-legs dribbles, but it is far more likely to survive the second half of a real game.
Ready to turn your dribbling practice into a more focused performance routine?
Thank you for reading this strategic analysis.
Tactical Review · High-Stakes Insights · Strategic Excellence